Mint Impact Certificate

Bundle an assessment and approved work into a Hypercert-backed certificate.
What this helps you do
Mint an impact certificate after the garden has an assessment and approved work that support a clear claim. The current admin UI may call this Create Hypercert or Mint Hypercert; it is the same Hypercert-backed certificate flow.
Use this page when the evidence is ready, not just when the queue is large. A good certificate groups work by a coherent impact claim, reporting period, or initiative.
Owners and operators can mint. Evaluators and funders can inspect the evidence, but they cannot finalize the certificate unless they also have owner/operator authority.
Before you start
- The garden has an assessment with the right domain and reporting window.
- The work you want to include is approved, not pending.
- The selected work belongs together as one defensible claim.
- Contributor wallet addresses are ready.
- You know how certificate units should be shared among contributors. This is the certificate allocation, not a separate splits contract.
- The Certify flow is available in admin for this garden.
Do not include weak or unrelated work just to make the certificate look more impressive. It is better to mint a smaller certificate with a cleaner evidence trail.
Step-by-step flow
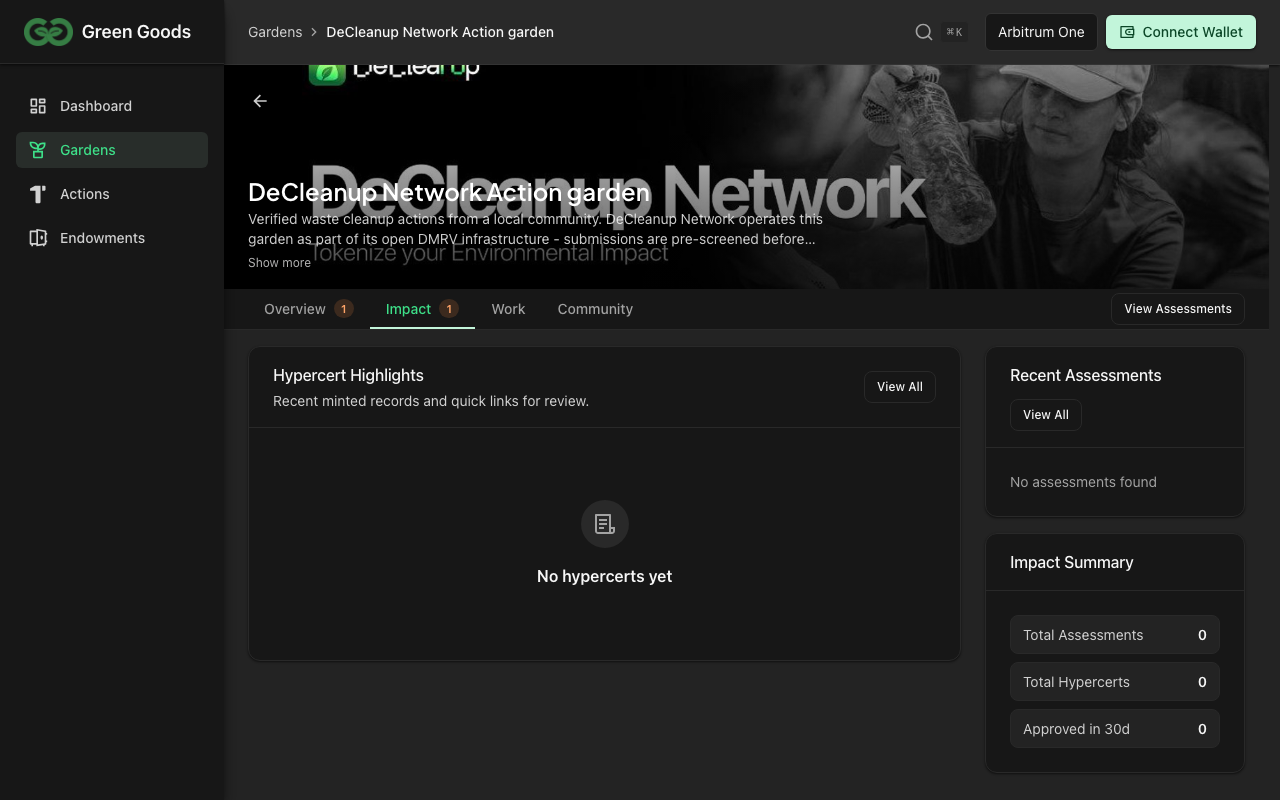
Start from the admin Hub workspace. The certification surface is labelled Certify, and the mint action opens the Create Hypercert form for the selected garden.
- 1
Open the Certify workspace
Open Hub, switch to Certify, select the garden, and start the Create Hypercert or Mint Hypercert flow.
- 2
Select approved work
Choose the approved work records that belong to this certificate. Use the assessment domain and reporting window to keep the claim focused.
- 3
Review certificate metadata
Check the title, description, work scope, impact scope, timeframes, and tags. Assessment-backed defaults are a starting point, not a substitute for review.
- 4
Allocate certificate units
Assign units to the contributor addresses. Keep the allocation aligned with who did the verified work and make sure the total is valid.
- 5
Preview and mint
Review the final certificate, selected evidence, contributor allocation, and chain. Submit only when the claim is accurate, then sign the mint transaction.
How to know it worked
- The minting flow completes and shows a transaction hash or success state.
- Admin opens the certificate detail page.
- The detail page shows the expected title, description, work scope, evidence count, minted date, and total units.
- If indexing is still catching up, the page shows a syncing state instead of a missing certificate.
If something goes wrong
- No garden selected. Pick the garden in admin, then reopen the Certify workspace.
- No permission. Ask the garden owner to add you as an owner or operator.
- No approved work. Return to Review and Approve Work and clear the relevant submissions first.
- Assessment filter hides expected work. Check the assessment domain and reporting window. The work may belong in a different assessment or certificate.
- Distribution validation fails. Recheck contributor addresses and unit totals before trying to mint.
- Certify flow is unavailable. Contact the platform team or use the Telegram support link in the docs footer.
- Mint transaction fails. Check the wallet message, make sure you are on Arbitrum, confirm the same signer is connected, and retry when the wallet has enough gas.
After minting
After minting, use the certificate detail page to inspect the evidence trail, monitor indexing, and continue with any listing or reporting steps your garden has planned.