Submit Work
Choose the action, add evidence, then review before upload.
What this helps you do
Submit a clear record of work you completed in a garden so an operator can review it. You will pick the right garden and action, attach evidence, fill in the details, and send it in.
Before you start
- Sign in with the same account that joined the garden.
- Confirm you are in the right garden. Many gardeners belong to more than one.
- Check that the garden has an active action matching the work you completed. If you are not sure which action to use, ask the operator before submitting.
- Keep your photos, short video, audio note, measurements, or field notes ready.
- Weak signal is okay. Drafts and queued submissions stay on your device and sync when the network comes back.
If you do not see any actions, check that you joined the right garden and ask the operator whether the action is active.
Step-by-step flow
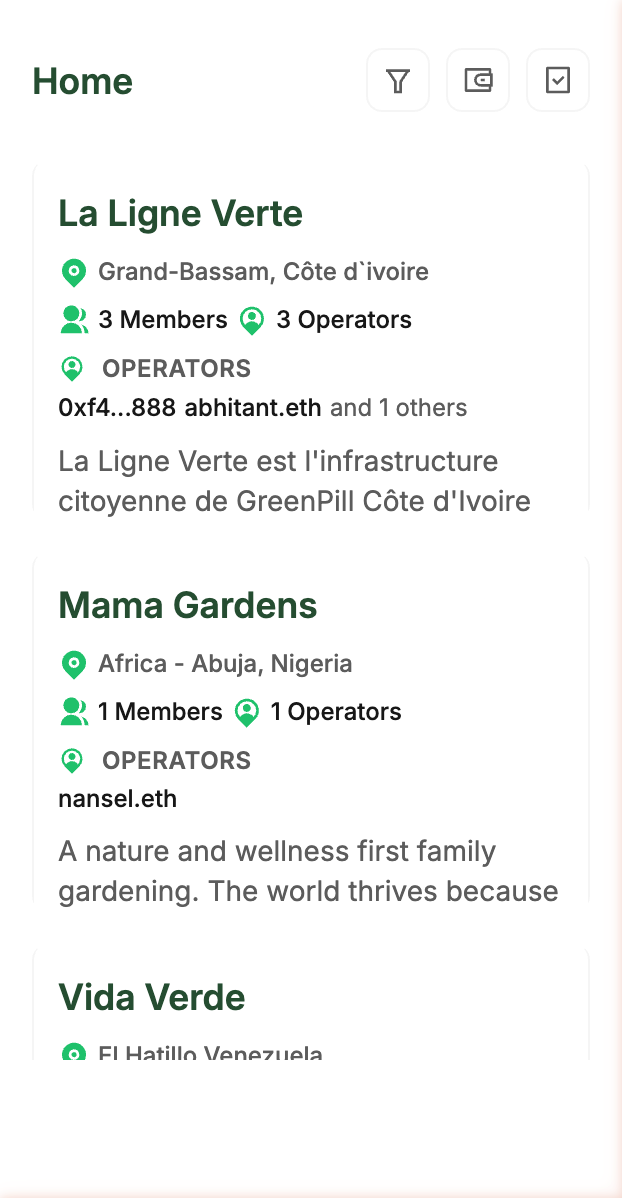
Step 1: Choose the action and garden
Every submission starts with what you did and where you did it.
- From your home screen, open the work flow and tap Start Gardening.
- If your garden covers more than one domain, use the tabs along the top, such as Solar, Agroforestry, Education, or Waste, to narrow the action list.
- Tap the action that matches the work you actually completed. Ask the operator if two actions seem close.
- Tap the garden you are submitting for.
- Continue only after both the action and garden are selected.
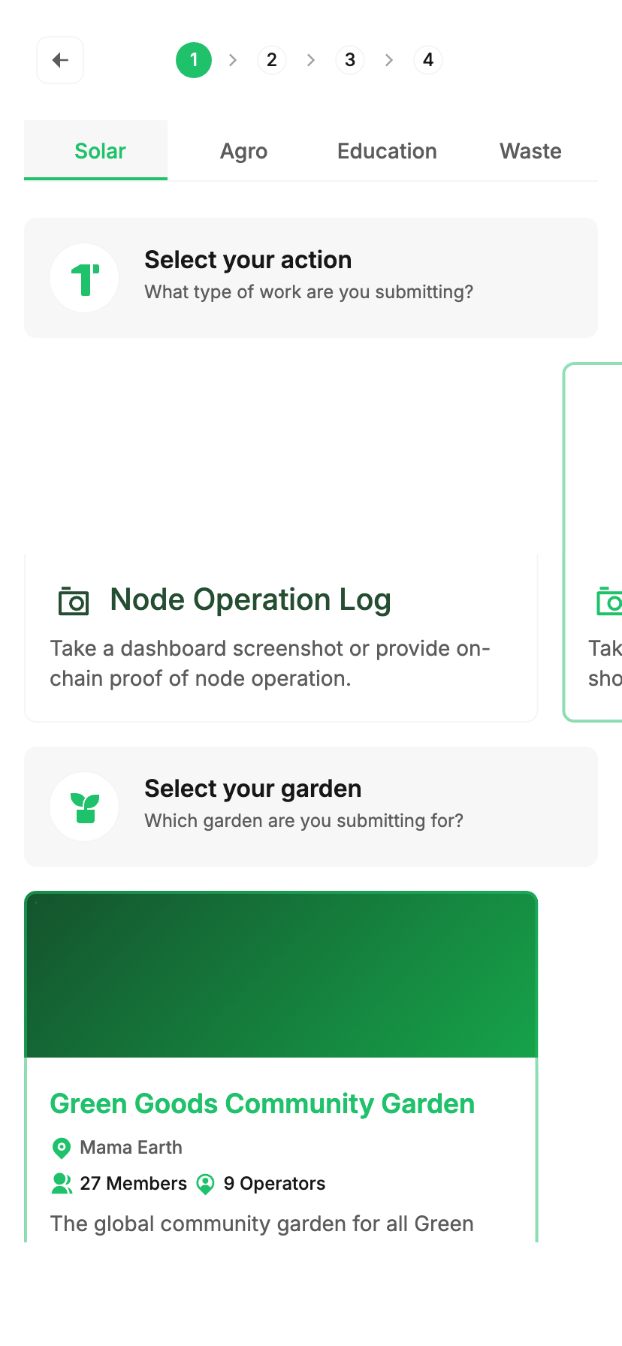
Choose the action and garden before you add evidence. A correct submission is much easier to approve.
Step 2: Add evidence
Evidence should make the completed work easy to verify.
- Use the photo or camera controls to attach images.
- Add a short video or audio note when the action supports it and it helps explain the work.
- Read the action's media requirements. They tell you how many files are needed and what they should show.
- Retake blurry, dark, or incomplete evidence before you move on.
- When the action requirements are met, tap Add Details.

Add evidence that matches the action requirements. A clear photo usually beats a long explanation.
Step 3: Add details
Details are different for each action and follow the template the operator set up.
- Fill in each field shown for this action.
- Use real values. Do not enter placeholder text or "N/A" where a number is expected.
- Add short notes when they help the operator understand what happened in the field.
- If a required field is missing, the app blocks the next step until it is complete.
- When the form is valid, tap Review Work.
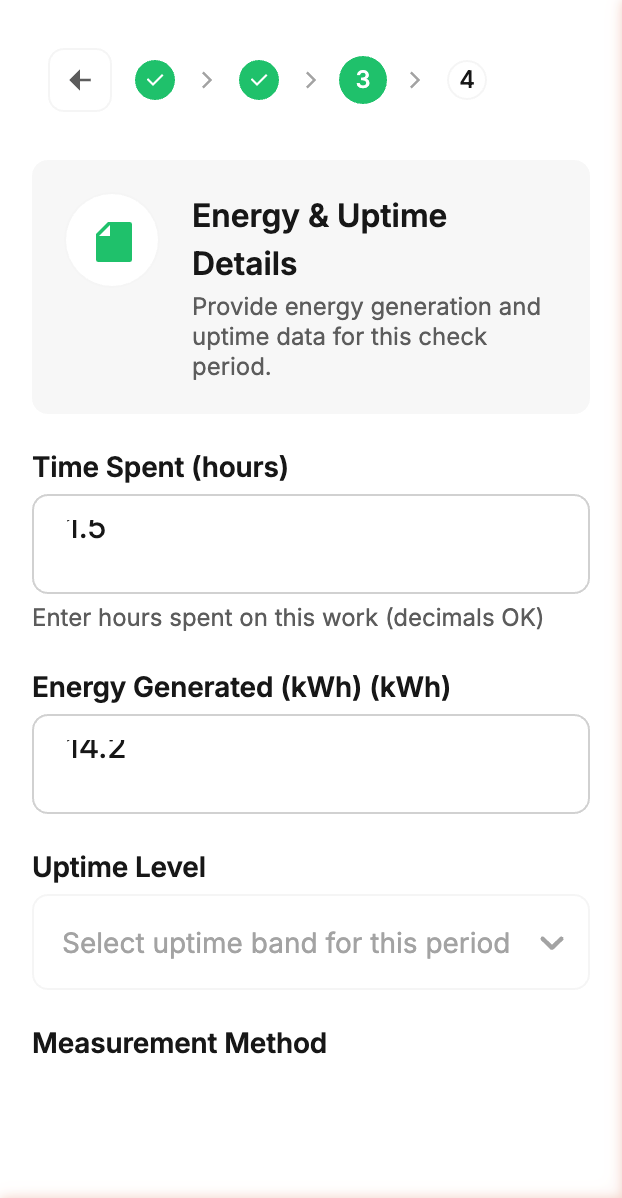
Make the details concrete enough for an operator to verify without guessing.
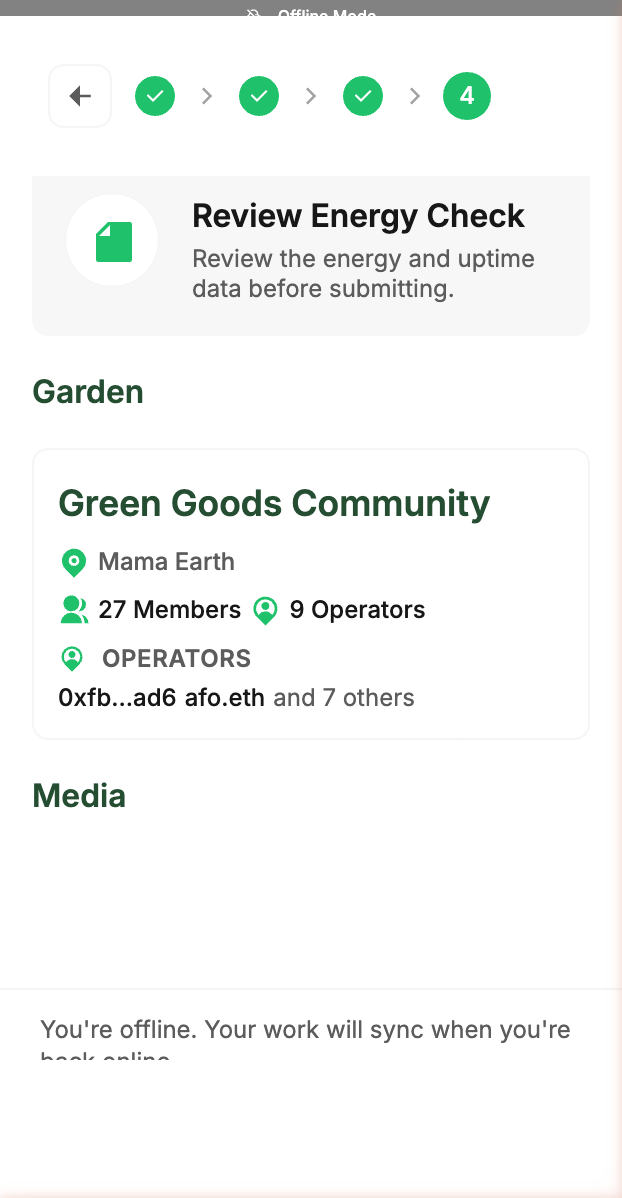
Step 4: Review and upload
One last look prevents most rework.
- Check the action, garden, evidence, and details.
- If anything is wrong, go back and fix it before you submit.
- Tap Upload Work when the record is complete.
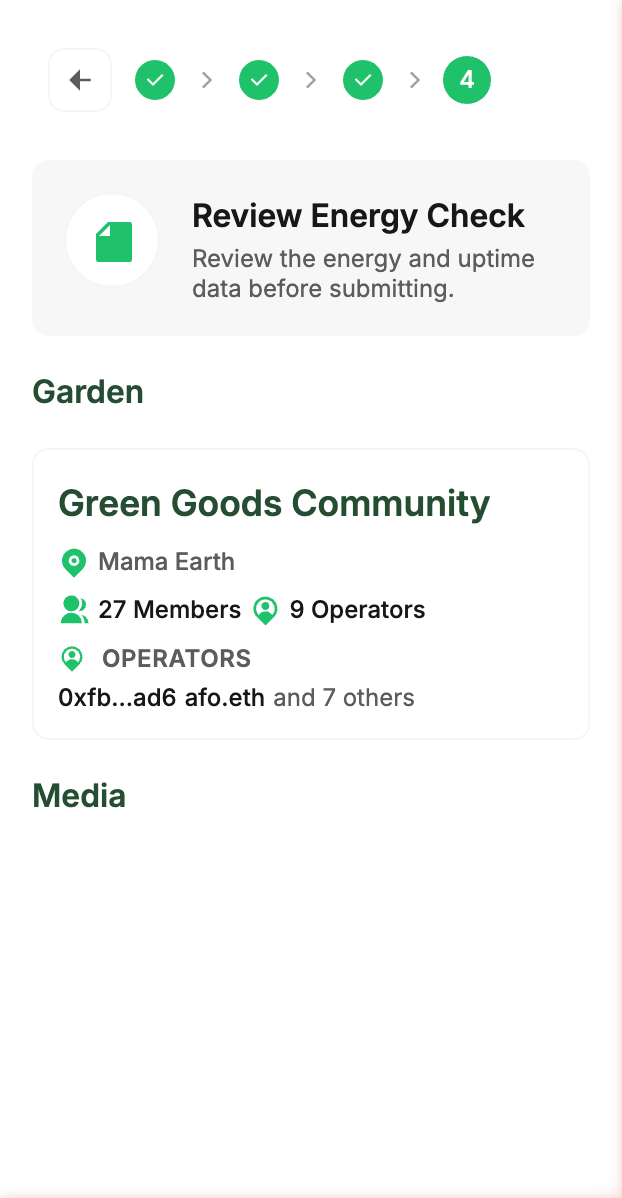
This is your last chance to catch the wrong garden, wrong action, or missing evidence.
If you are offline
Green Goods is built for field conditions.
- If the app says you are offline, your work is queued on your device.
- When the app is open and the network returns, sync can resume.
- Give the queue a moment to clear before you submit the same kind of work again.
- Do not create a duplicate submission just because the first one has not synced yet.
Offline does not mean lost. Leave the draft or queued item in place and let it sync.
How to know it worked
After you tap Upload Work, open the Work Dashboard from your home screen.
- A new submission may first show as syncing or queued.
- Once synced, it stays in Pending while an operator reviews it.
- After review, it moves to Approved or Rejected with any operator feedback.
- If it is rejected, read the feedback, fix the issue, and submit a corrected record for the right garden and action.
If something goes wrong
- The next button is disabled. A required field or media item is missing. Scroll back and look for an empty field or unmet media count.
- Media disappeared from a draft. Reopen the draft from the Work Dashboard and reattach the files before submitting.
- Upload keeps failing. Wait for connectivity to return, then retry from the dashboard. Do not create a duplicate draft for the same work.
- Your submission was rejected. Use the operator's feedback as the checklist for your corrected submission.
- You need help. Open Profile help in the app or use the Green Goods Telegram support link in the docs footer.